zondag 23 september 2012

M18 got its base color

After hours swearing, sanding and re-attaching those damned PE parts that seem to fall off every time i only look at the model i finaly got it airbrushed in the base color.


Instead of using the OD color surface primer i used the white one this time. The reason for this is i wanted to try a different shading technique. This technique basicly consist of creating a grey tinted version of your model first and then spray it with thin layers of your base color resulting in a beautyful shadowed model.

On paper (and with a german grey vehicle) this worked like a charm but on my OD verhicle and using Vallejo paint the base color came out to yellow so i ended up doing the basic pre-shading steps

The mantle cover still needs it base kakhi color.


vrijdag 21 september 2012

Stowage, stowage, stowage

I am always short of stowage items to dress up my models. Shure, tarps and bedrolls can be made from putty but adding detail to them is a hell of a job. Offcourse there is a wide selction of companies selling stowage sets but those sets are mostly dedicated to a specific model and quite expensive.

I found a company called Value Gear that sells a collection of tarps, tents and crates for a nice price where i ordered a couple of sets.

After a couple of days my order was delivered by the mailman that, besides the ordered items, also contained some sample items from a new crates set that is going to be available later.


I am looking forward to try these items on my new models.

woensdag 19 september 2012

M18, Academy

After building M4 and M10 models for a while it's time for a new project, one without assembling sherman bogies !

Besides sherman tanks i am also interested  into allied tank destroyers. My new project, the Academy M18 hellcat kit, is such a tank destroyer. This will be my first build where i am using aftermarket details, a PE set from Eduard.

Some pictures:


zondag 16 september 2012

M4A2, a model's second chance part V

I think i have overdone the mud part of weathering the running gear a bit.


I used a combination of airbrush/brush speckle technique's on applying a mixture of plaster and mud colors. The complete hull is airbrushed with a highly diluted mixture of ak-interactive dust effects.

donderdag 13 september 2012

M4A2, a model's second chance part IV

After the base color eas done i painted the details and started weathering. I tried some fading/striking effects using oil paints.


dinsdag 11 september 2012

M4A1 "in the mood" done

I declare this one done. It's weathered, got stowage (i even scratch builded a crate :) ).


maandag 10 september 2012

M4A2, a model's second chance part III

After priming and preshading the model it was painted using Vallejo model air OD and lightend using a OD/ dark yellow mix.


Another layer of lighter shade of olive drab will be applied to the model next.

zondag 9 september 2012

M4A2, a model's second chance part II

After some sanding and putty the sherman received a primer layer and black pre shading.


After browsing left-over sprues from sherman kits i did before i found the pieces that got lost during the paint remove step.

M4A1 "in the mood" stowage part II

I did some work on my M4A1 "in the mood" project. While the weathering is done some work is stille required in adding some stowage.


To prevent my sticky fingers and putty to leave marks on the model i used some household plastic wrapper while fitting the stowage pieces and modelling the tarp in place.


The stowage pieces andtarps are painted in their (light) base colors and will receive a accent glaze that will make the items darker and more detailed.

zaterdag 8 september 2012

M4A2, A model's second chance

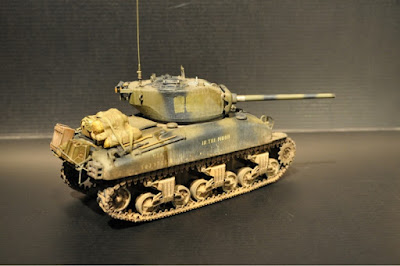
While there are enough kits waiting to be build in my stash i wanted to practice more on painting and weathering. For this i decided to give an old M4A2 76mm W a second chance.

The M4A2 sherman was a diesel engined sherman and therefor never used by the US army in the ETO because all other engines used by the US army where gasoline types and adding a diesel type would inpractical from a logistic point of view.
The M4A2 did see action in the ETO. Thanks to the lend-lease program Both the commonwealth as the Russian armies made use of this tank.


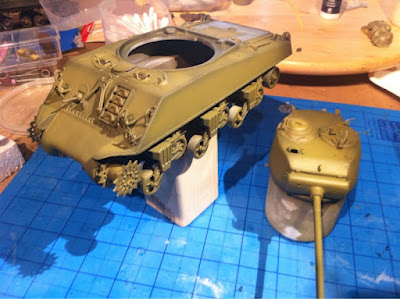
The used model, kit number 6483 from Italeri, was first stripped from its paint. This was done by spraying it with a kitchen degreaser and removing the old paint using a toothbrush.

The paint came off like a charm except for the the primer layer, this required some heavy brushing. Some fragile pieces like the headlight brushguards broke off and ofcourse got lost. I will have to replace those with some scrath build ones.


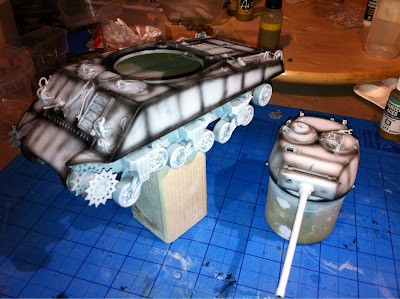
At this moment i am working on the hull and turret using putty and sanding. The piece of wood is used to hold the model while painting and is bolted to it using a wingnut.

dinsdag 4 september 2012

M4A1 "in the mood" mud effects part II

The sherman got the fresh mud layer together with some wet mud streaks on its lower hull. Time for glueing on the tracks.


There are a couple of things i learned while doing this:

Leave the bogies off while weathering the lower hull, this will make things so much more easy when adding mud effects using a airbrush.

Assembling and adding the fixed tracks to the tank goes more easy when they are divided in morem then two pieces. Because some "force" needed to be applied to the tracks to make them fit around the idler and sprocket wheels, they broke multiple times.

maandag 3 september 2012

M4A1 "in the mood" mud effects part I

This morning the AK-Interactive mud effects set arrived and gone was the excuse about skipping the mud anddust part of the weathering proces (this step usually goes terribly wrong by me).

Together with the mud set i also ordered the "Washes, fading and oils" weathering techniques DVD to study the correct techniques for applying the AK-Interactive products.

I applied the first layer of (dry) mud to the sherman using a mixture of plaster, mud and dust effects using a old brush and air from the air brush andthis is the result:


One thing i already like about the plaster and AK-Interactive mud effects approach is that, since these products are based on enamel, they can be corrected using white spirit.

The next step will be the second layer of wet mud.